Wednesday, March 5, 2008
It took me a lot of trial and error to get my photos to an acceptable stage. (I say "acceptable", because there is always room for improvement.)
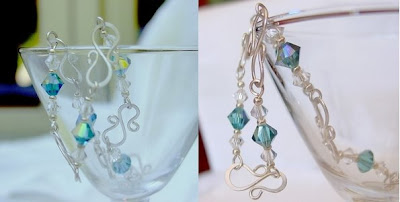
 Makes a huge difference, doesn't it. Not only is the background close to the original color, but now the gemstones really "pop".
2) Control the exposure time of your pictures. This is useful if your photos are extremely washed out (too much exposure) or dull/dark (too little exposure). The range on most cameras is -2 to 2 and is usually set to 0 by default. A setting of +1 is a good place to start.
Here is an example in a lightbox. The exposure for the left picture is +1, the middle is 0, and the right picture is at -1. Depending on the ambient lighting and the background, the optimal exposure will vary.

In this case, a setting between +1 and 0 would probably be best.
3) Use optimal lighting. Natural diffused daylight is best. 2nd best is a lightbox. (Never use your flash, at least on jewelry- it can create a one dimensional washed out look.)
Get a lightbox or make one. Then you won't have to rely on the sun all the time. It's easy to make one; here's a few links.

4) Use the macro setting on your camera if you are photographing small items or want to take detailed close-up shots. (The icon is a little flower.) This setting helps your camera focus on small details within your image. You will either need a really steady hand or you might consider using a tripod.
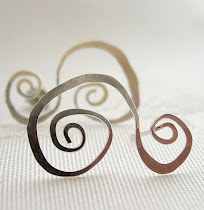
Here's an example of the kind of detail you can get with the macro setting. Guess which picture was taken using the macro lens setting!
 With out the macro setting, I would have to take the photo several feet farther from the item. I would lose detail, even if I cropped the photo severely.
5) Use a photo editing program. A photo can be saved with cropping and brightening. Some things I usually use to improve my photos are increasing contrast, gamma correction, increasing or decreasing the saturation, and sharpening.
Photoshop is a great program for editing. But some free (and simpler) programs include Picassa and Photofiltre.

This made a huge difference. The colors in the background and in the rose quartz stone are now true. The result is that this photo almost doesn't look bad!
Here's a few great examples that I found on Etsy. (You might be able to recognize a couple of sellers from their photograpy.
 If If you find something that works, stick with it. A lot of successful sellers have unique styles that make them instantly recognizable. (I haven't acheived this yet, but I'm still working on it.)
7) Look on Etsy for ideas! There's a lot of great inspiration out there.
If you'd be interesting in subscribing to my blog and receiving it by e-mail, just click Subscribe to Contrariwise ramblings by Email


Photography is a love-hate thing isn't it? lol
you have really perfected your craft.
LOVE IT!
Most items that I photograph are too big for a lightbox (unless it was huge). But I can try your other tips right away. Yay!
http://www.alankarshilpa.blogspot.
com
Http;//www.bead-z-mommys-business.com