Wednesday, April 9, 2008
When you are just starting out with a business and money is tight, sometimes you have to make do with what you have. Even though a lot of inexpensive printing options are available, maybe you can't afford to get pretty business cards printed yet. Or maybe you haven't met many people, so you only need a few cards for right now.
If you have Microsoft Office, you can easily create your own custom business cards. (Although the steps may not be obvious.) Printing your own business cards can be an pretty affordable - of course you have to figure in the costs of the cardstock or labels, and the cost of color cartridges.
This is how I created my business cards. (It may seem like a lot of instructions, but it's really not hard at all.)
1. Open a blank document in Word. On the Tools menu, point to Letters and Mailings, and then click Envelopes and Labels.
2. You'll see a dialog box, like the one below, open. Click on the labels tab and then on the options button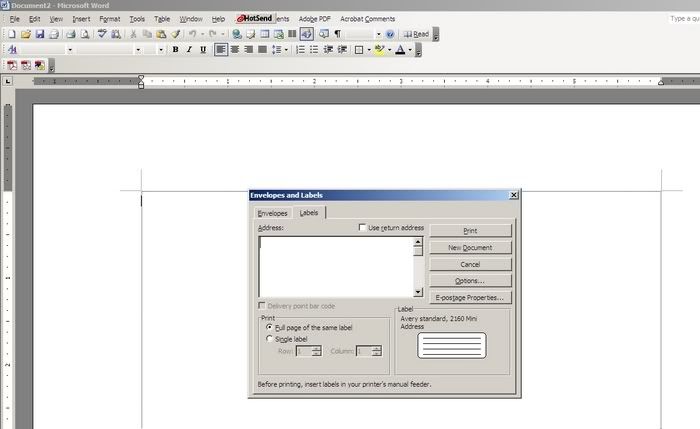
3. Next the Label Options dialog box will open. Make sure the drop-down says Avery Standard and then scroll the Product Number down to 5371. Click OK.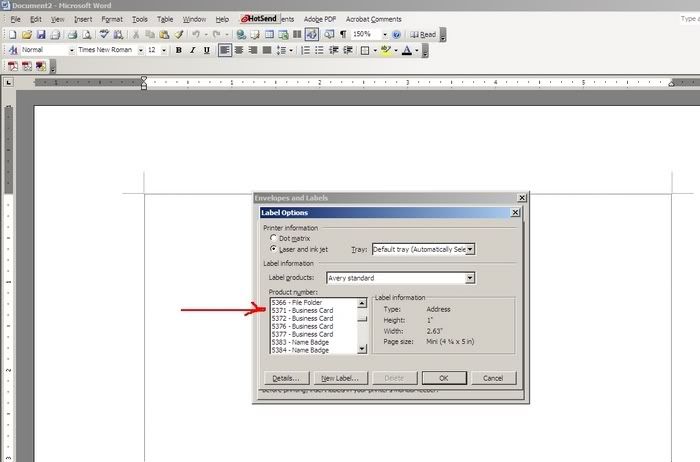
4. Back in the Envelopes and Labels dialog box, make sure under Print, it says full page of the Same Label. Then click New Document.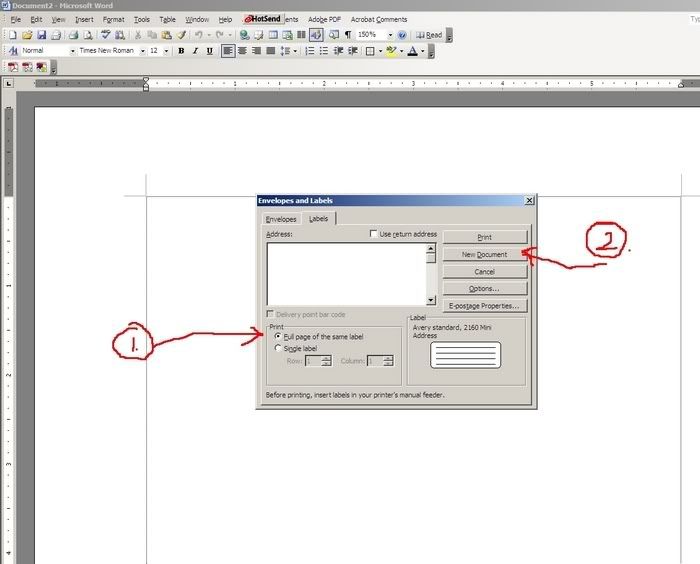
A table appears with a bunch of 2 inch x 3.5 inch cells: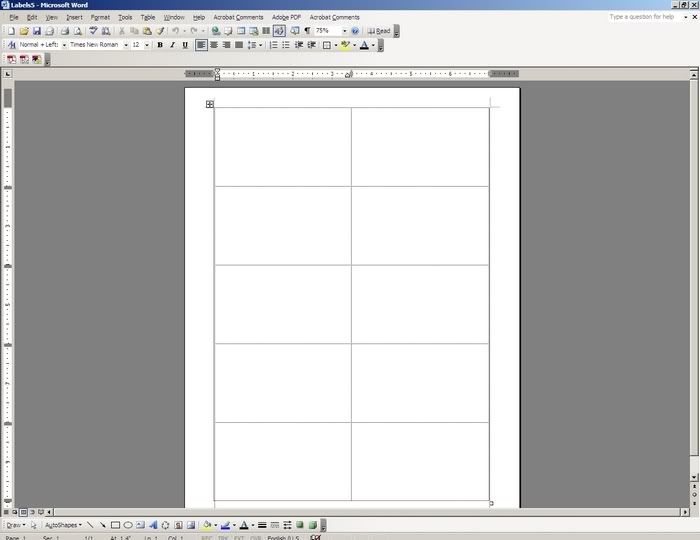
5. Now you can start setting up your first business card.
To add your logo or a picture, choose InsertPictureFrom File. Find your logo file on your hard drive and insert it.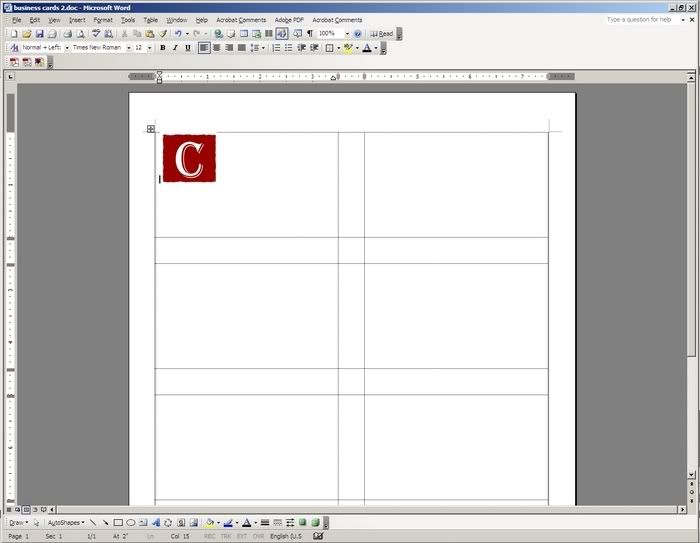
(BTW, I created the "C" using PowerPoint.)
6. Add your contact information on the card. If you want to add a tab to move some text over within the table cell, press Ctrl+Tab. (Just pressing tab by itself moves you to the next cell.)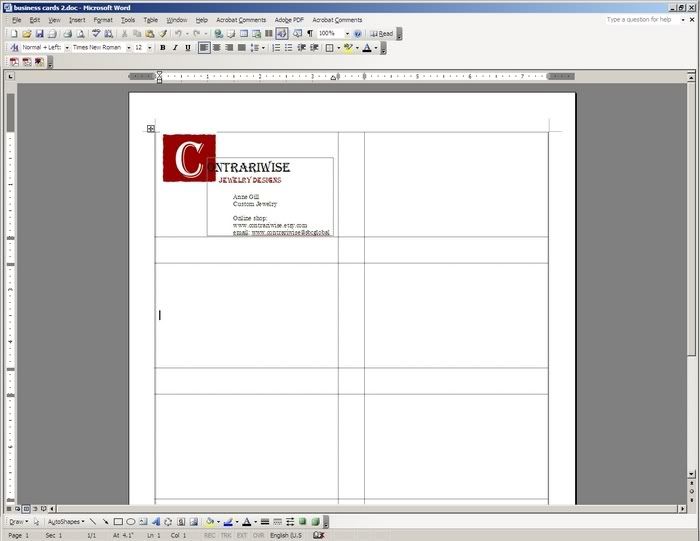
7. Once you have one card set up the way you like it, click and drag to highlight it. Press Ctrl+C to copy it. Then move to the next cell and press Ctrl+V to paste it in.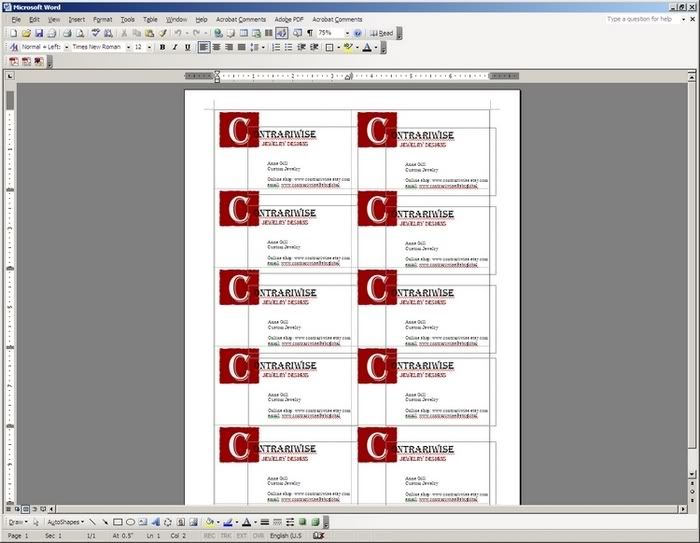
8. If you have the perforated Avery stock, all you have to do is run it through your printer and tear them apart. If you don't have the prefab stuff, or you don't want to use it, you can still do cards on plain old (cheapie) card stock and cut them yourself.
If you want to print them on card stock (like I did), it's a lot easier to cut them out if you put a very light border on the table.
Choose TableSelect Table:
And then choose FormatBorders and Shading:
In the Borders tab, click Grid. In the color drop-down choose Gray-25%:
In the Width drop-down change it to 1/4 point:
After you print it out, get out your X-acto knife or scissors or use a paper cutter and start cutting on the lines.
There you have it! Quick and easy business cards right from Microsoft Word.
(If you'd be interesting in subscribing to my blog and receiving it by e-mail, just click Subscribe to Contrariwise ramblings by Email.)
Labels: tutorial



i wish i had known about this before i had my last batch printed
next time :)
P~
http://cloud9designstudio.etsy.com
I too enjoy making tutorials. You did a great job at making this one, by the way.
Do you know how to make super high gloss business cards on thick (really thick) paper stock?
Or where can I get them printed fairlycheap on high gloss thick paper stock if i design them myself?
I hate a cheesy card. I want cards that look classy like photos? (like a collectable baseball card quality) I have been there and done that - printing my own cards on my computer. The print quality just says to my customers that I am too cheap or to unsuccessful to be able to go to a great printer to have them made. Maybe that's just me, but i like a card that makes an impression on my customers or prospect custmers that i a successful.
I will be back to read more. I enjoyed he tutorial. Do you have other tutorials???
i found your blog through google.com search.
Michael
WANT tons of FREE stuff? Go to http://ViralURL.com/MichaelOcala/free
cheers!
sorry - i just forgot to mention that.
Michael Jensen
http://ViralURL.com/MichaelOcala/free