Monday, October 11, 2010
MooShu can be happy with the most trivial things.
Thursday, July 1, 2010

A box of new toys for making jewelry.
All of this is stuff I've never used before but I've been dying to try. I just put in an order on Monday with Contenti, and I wasn't expecting to see my shipment for a week. But here it is!
It's just like Christmas at my house. It took me about 5 minutes to rip open the package.
Whoo hoo! What did I get!!!???

- A DRILL PRESS. Although this is their economy model, it should make it easier for me to make holes in metal and cut-outs in metal (for example, the settings behind my cabs).
I've wanted it ever since Contenti started carrying it, but it's been out of stock for months. Until this week.
I especially appreciate this description in their listing: "The instruction booklet provided with the unit is written in incomprehensible English. For the sake of clarity, we have re-written them." (So true to life that it's almost funny.)
Yup, no more using my dremel, which is pretty inaccurate for drilling and has made me ruin more than a couple pieces.
- A NYLON HAMMER. No, not for me to whack my husband. But for me to whack silver without marring it. I'm hoping it works even better than my rawhide mallet.
- BINDING WIRE. To place little bits of silver into bondage for me to solder them more accurately. Never tried it before. This might prove to be very interesting, fun and, probably, oh so frustrating.
Or, as those of us in the corporate world are taught to say, "This will be an opportunity." (ARGH!!!!)
- A CHARCOAL BLOCK. Yes, I'm going place my leftover scraps of sterling on this and melt them into little balls of solid silver goodness.
And, best of all, something I should have gotten long ago:
- AN OPTIVISOR. 5 x, with a loupe.

And yes, my daughter literally just threatened to disown me.
Do you want to receive my blog by email? Click here!
Would you like to be a Contrariwise Follower and see what trouble I might be up to or what I'm working on? All you have to do is click on the link on the left in my side bar.
Tuesday, June 29, 2010
 Just a quick post to show you a new listing in my shop.
I'm making an attempt to be better in creating some of my jewelry in multiples.
For example, it used to be that I would only make a single pair of earrings. "Why should I make more", I'd think. "If I make several and they don't sell, the silver and gemstones will be a loss".
Now that I've established my shop and have a little more experience, I know that I should keep some items always in stock. (Can't do that with those one-of-a-kind cabs though! I think that's one of the reasons I love them.)
Right now my sales are a little slow, but that's usually the case in the summer months. (No, no, no, I'm not complaining.) Come December, I'll be rushing around trying to keep up with orders. I know it's only June, but I want to promise myself to start preparing for Christmas.
Do you want to receive my blog by email? Click here!
Would you like to be a Contrariwise Follower and see what trouble I might be up to or what I'm working on? All you have to do is click on the link on the left in my side bar.
Monday, June 28, 2010

The only person I met from Etsy that I knew was GemCutter. It was like meeting an old friend. I got a chance to see his cabs in person and preview some that he'll have in his Etsy shop later this week. A few of the ones he was going to list went home with me. (Do you see that huge plume agate and the large Bruno Jasper. Sorry, they're never going to get listed in his shop as they're mine!)
I thought I bought quite a lot of cabs, but when I laid them out to photograph, it doesn't seem to look like much. As you can see in the photo I got some Atlantiscite, plume agates, bruno jasper, imperial jasper, turquoise, a boulder opal, and a bunch of other stuff. (If you want to see individual photos of the cabs, go to my flickr site. )
It's so nice being able to see the cabs rather than buying them on line. They look so different in person and you really know what you're getting. I bought a couple new types that I'd never seen in person, the bruno jasper and the imperial jasper. I'd never been impressed when I'd seen photos of them. They looked pretty boring in photos so I never bought them. But when I saw them in person - WOW! Especially the Imperial Jasper - it has an amazing inner glow that is so difficult to capture.
It was hotter than heck and I was so exhausted when I got back home. ( I have no idea how the sellers can do it.) But I'm already planning to go again next year.
Do you want to receive my blog by email? Click here!
Would you like to be a Contrariwise Follower and see what trouble I might be up to or what I'm working on? All you have to do is click on the link on the left in my side bar.
Friday, June 25, 2010
Guess where I'm going this weekend!

Do you want to receive my blog by email? Click here!
Would you like to be a Contrariwise Follower and see what trouble I might be up to or what I'm working on? All you have to do is click on the link on the left in my side bar.
Thursday, June 24, 2010

Summer has really taken a bite out of my hours on the workbench. I used to have time in the evenings when my daughter was busy with her gymnastics, but during the summer she practices during the day when I’m at my full-time (non-jewelry making, corporate America) job. Plus my older daughter is back home from college and they both want attention from me when I get home from work.
Not only do the kids want attention, but my yard needs attention! Spring and summer is when I make my pathetic attempts at gardening. This year I’ve sworn to get the back yard in shape (I’m sure my husband is laughing as he reads this) although I doubt that I’ll be able to tackle my side yard. (Only one side of the house per year. Neither my attention span nor my gardening abilities will allow for more!)
And, of course, there is the temptation to just enjoy the summertime. I was definitely doing some of that, this past weekend. We have an artsy area of town and I was there checking out these cute little shops that sell hand-crafted jewelry. And there were so many lovely pieces!
One of the shops I visited had some bezel-set pendants under the counter. There were ocean jaspers, laradorites, moonstones, and others. I thought the quality of the cabochons was pretty poor. (Not to brag, but the ones I've acquired put them to shame.)
I asked to see the pendants because I was curious about the prices. I like to think that someday in the future I might try to market my work to some boutiques and I wanted to check out the potential competition.
Now the cabs were simply set in bezels - I like to think that I put some effort into customizing each setting to bring out the best in each cab. Still, when I saw the prices of the pendants I was a little disturbed. They were priced at almost half of what I would charge for my bezel-set cabs!
All were made in Indonesia. Considering that the shop’s mark-up must be twice of what they paid for the pendants, and that the distributor was making a profit as well as the original shop, I can’t imagine how little the workers must be paid - although it's so likely that the wages they're receiving in Indonesia, although so minimal, are probably crucial to their families' well being and survival.
Right now, based on the cost of materials, equipment, and the amount I pay for taxes, I'm pretty much breaking even. I can't imagine selling my works to a boutique/shop for 50% of what I charge on Etsy. Nor can I imagine increasing my prices on Etsy just so that I can reasonably sell to a shop.
I guess I'll just continue to be an independent artist on Etsy for a while longer.
(Sorry for the rambling post.)
Do you want to receive my blog by email? Click here!
Would you like to be a Contrariwise Follower and see what trouble I might be up to or what I'm working on? All you have to do is click on the link on the left in my side bar.
Wednesday, June 23, 2010


Do you want to receive my blog by email? Click here!
Would you like to be a Contrariwise Follower and see what trouble I might be up to or what I'm working on? All you have to do is click on the link on the left in my side bar.
Monday, June 21, 2010
MooShu is quite good at fetch. In fact, he's better than any other dog I ever had, even dogs with retriever blood in them!
He has a tiny little tennis ball and, after fetching it, lays it down at my feet to throw it again. If I don't pick it up, he'll pick it up and toss it at me. Slowly he learned that picking something up and tossing it can be a game he can play by himself.
So here's MooShu with an acorn that turns out to make a very nice substitute for a discus.
(Oh, and if you look carefully, you'll see the absolute first appearance of Contrariwise (me!) in this blog.)
Do you want to receive my blog by email? Click here!
Would you like to be a Contrariwise Follower and see what MooShu might be up to or what I'm working on? All you have to do is click on the link on the left in my side bar.
Friday, June 18, 2010
Box of Heads found on Plane - now with photo goodness!
1 comments Posted by Contrariwise at 12:01 AMI saw this headline on Drudge yesterday:

Intriguing. But it couldn't possibly be real heads, could it? I just had to find out. So I clicked on the link and the following article came up:

Could it be?????

Thursday, June 17, 2010

1. It took me forever to get the bail into a graceful shape that approximates the vines in the rest of the design. Every time I would get the front part right, the back of the bail didn't sit in the right position. But worse still, once I finally got the bail on, the chain wouldn’t balance properly, making the cab look tilted. So I had to “unsolder” the bail and make a new one.
Twice.
(After ruining 5 bails, I’ll know better in the future.)
2. I also learned that an adjustable chain should not be directly attached to a necklace if you want it to hang straight. (It hangs straight at 18 inches, but is off-center when the chain adjusted to any other length.) So I had to add a jump ring to the bail and string the chain thought it, so that the pendant can move freely.
And then I didn’t have any beads for accents that were the right color. So I made a special trip to a bead shop and bought 2 beads. Just 2 beads. (I spent more on gas to get to the shop than I spent on the beads.)
3. Thank goodness there’s one mistake I didn’t make. I remembered to oxidize the silver before the turquoise cab is in the setting. (And, oh yes, I learned this the hard way. Most stones aren't stained by the oxidizing solution. Most. Not turquoise.)
It's late now. I know enough not to work on a piece when I'm tired. Otherwise I'd do a little more fininshing of the sterling, set the cab, and finally be done!
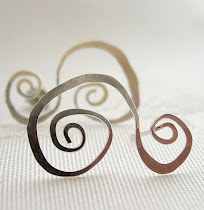
And now for something that went right – despite me!

To be honest, this was not at all the way I envisioned setting the ring. Never in a million years would I have thought of adding those little spheres on either side. But it works!
And right now, it's on the way to the buyer. (I hope she likes it.)
Do you want to receive my blog by email? Click here!
Would you like to be a Contrariwise Follower and see what trouble I might be up to or what I'm working on? All you have to do is click on the link on the left in my side bar.
Wednesday, June 16, 2010
Ring-sized cabochons to design your own personal piece of jewelry
3 comments Posted by Contrariwise at 12:01 AMI think these are amongst the best cabs in my collection. Each is so unique and would make an incredible ring or pendant.
I'm offering these for custom designs. They'll be listed in my shop on Wednesday.
 1. Amethyst Sage. I love this stone and can't seem to pass them up. This cabochon contains both purple agate and feathery plumes with gold highlights in a lovely assymetrical shape. Size: 25 x 30 mm
2. Galah porcelain agate. This is a very special agate from Agate creek in North Queensland Australia. The pink color combined with the banded patterns is so beautiful. (Collected 15 years ago by a well known opal and agate seller from Queensland Australia.) Size: 20 x 22mm
3. Blue Moss Agate - This Blue Moss is features blue and black mossy inclusions in a clear/milky white agate base. An exquisite cab. Size: 17 x 15mm
4. Morrisonite Jasper. UPDATE 6/17/2010: this one is now sold. It's been replaced with a bright yellow and red Mookaite in my Etsy listing
5. Ocean Jasper. (One of my favorite stones) Here's a striking and unusual green and white Ocean Jasper cab with green orbs outlined by a white lacy halo. It also features a milky white agate covered druzy pocket. So icy. Size: 27 x 18mm
ALSO, tomorrow I'm planning to post some things I've been working on. One is a finished ring and the other is a work in progress. (Yes, that turquoise pendant. It's been giving me all sorts of headaches, but I think it's finally coming along. It's been quite a learning experience for me.)
Do you want to receive my blog by email? Click here!
Would you like to be a Contrariwise Follower and see what trouble I might be up to or what I'm working on? All you have to do is click on the link on the left in my side bar.
Sunday, June 13, 2010
New cabochons available to design your own necklace or ring
3 comments Posted by Contrariwise at 8:22 AM
I'm planning to list these in my Etsy shop on Monday. They're all cabs in sizes suitable for pendants or, in a couple cases, large cocktail rings.
I tried to get a good mix of different stones and these are amongst the favorites in my collection. They are, from top to right:
1. A frosty colorless agate with green orbs. Some of the orbs have orange centers. Size: 33mm X 22mm
2. A Tiffany Stone (Bertrandite) in cream and golden browns with some picturesque dendrites. Not your usual purple Tiffany Stone. 40 x 24mm
3 A bright pink Rhodonite from Nevada. Super color on this one. Often seen in the lighter rose color, this one is a bright, bright pink. 27x37mm.
4. A Tiffany Stone with "chicken track" dendrites. The color of this cab ranges from light lavender to a deep bluish purple. 40 x 24
5. (Best for last?) I've been saving this one. A Graveyard Point Plume Agate with Druzy from Oregon. The druzy is out standing in this cab! 50 X 25 mm.
Do you want to receive my blog by email? Click here!
Would you like to be a Contrariwise Follower and see what trouble I might be up to or what I'm working on? All you have to do is click on the link on the left in my side bar.