Thursday, March 13, 2008

I've had some folks on Etsy ask me to write a tutorial on how to wire wrap a briolette. So I finally got around to it. Remember, this is the way I do it, and it may differ from other instructions you can find in bead books or on the internet.

Supplies:

  • Silver wire. (22, 24, or 26 gauge, depending on the desired effect, size of stone, and size of holes in the stone ) I don't cut my wire at a particular length; I use the entire roll and cut it at the end.

  • Bead / gemstone (briolette, teardrop, or marquise shape)

  • Round Nose Pliers

  • Cutting Pliers

  • Fingers


    Instructions:
    1)Thread the wire through the bead's hole, making it poke out about an inch on one side.

    2)Pinch both wires at the top of the briolette to form the shape of a triangle, making sure that the stone is centered

    3) Take the short end and wrap it around the longer wire 2-3 times, like this:


    4)Snip off the tiny bit of wire sticking out.


    5)Using your round pliers, create a loop:

    (You could actuall stop here, finish with a wrapped loop, and be done. But we'll continue with wrapping the wire down the gemstone.)


    6)Now start wrapping the wire. You will wrap around the wire below the loop, then wrap around the bead. You can stop wrapping above the hole in the bead or below it, depending on the look you want. In this case I wrapped below the hole.

    7) At this point you need to decide how to finish this off. There are a number of ways:


    • Cut the wire flush and either tuck it under the last wrap or press it neatly against the stone. (Tucking it under can cause the wrapping to loosen and become "messy". )


    • Wrap the wire back up the bead carefully, then secure it by tucking it into the bead hole. Below is an example of what it would look like. (This gorgeous wirewrapping was done by Raes Creations, who had the earrings for sale in her Etsy shop. Her blog is here. )


    • To create a purposely "messy" look, wrap the wire back up the bead loosely. Then secure below the loop as explained above. Example that I found on Etsy:


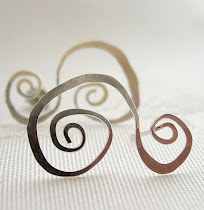
    • To create a swirl in front of the bead, cut the wire, leaving about 1/2 inch. Then create the swirl and press it against the bead. Example:

    • Wrap the wire back up once accross the front of the wrapping, then a couple of times below the loop. (My preferred method). Example:


    And that's all there is to it! Happy wire wrapping!

    Update on 3/18/08: The above can now be found at my online shop.


    If you'd be interesting in subscribing to my blog and receiving it by e-mail, just click Subscribe to Contrariwise ramblings by Email.


    Contrariwise Jewelry is now a proud member of Metalsmiths in Action: http://metalsmithsinaction.webs.com/index.htm

    29 Comments:

    1. Little Lovables said...
      thanks, that was great!
      Nicole Solo said...
      Great tutorial - especially with your quality photos :) I linked this from my tutorials list on http://nicolesolo.blogspot.com :)
      Anonymous said...
      This is a fabulous tutorial! Thanks so much!
      Orion Designs said...
      Very generous of you to share your techniques. Your work is fabulous.
      Vicki
      Unknown said...
      Great tutorial. I am using a different method ,but plan to try yours.
      Anonymous said...
      Awesome tutorial, nice pics. Very helpful!
      Infinite Cosmos said...
      oh cool! I am totally going to try that!
      woolies said...
      ok, this makes me want to start wire wrapping instead of knitting!.
      the only problem is that when I first read this (very early in the morning) I thought is said 'wire tapping', are you in the FBI?
      :0)
      Contrariwise said...
      woolies,
      LOL. I sometimes think the same thing about knitting.

      I should take it up. Do you have an article that would inspire me?

      God, I just realized what I just wrote. What am I thinking about!? Where would I find the time?!!!! LOL. (I really need to quit my 9 to 5 job.)
      Bea said...
      Thanks for putting pictures with every step -- and GOOD pictures! It's so much easier for me when I can see!
      Contrariwise said...
      If you've tried my tutorial, send my your pictures. I'd love to feature them in a post on this blog!
      outofthepinksky said...
      This was exactly what I was looking for! Thank you for writing this!
      Unknown said...
      Gotta try it. I did it differently, but I always wanted to travel down the briolette, but I didn't dare. Do I dare now????
      Cthings said...
      You made a wonderful tutorial! Great pictures and great explanation! Thanks so much for sharing. I'm off to try it.
      Luli Designs said...
      Great tutorial, thanks so much.
      Yoga Bridge said...
      Such a useful tip. I love your advice. You explain things very well. To-the-point and easy to understand. Thanks so much!
      ~marilyn said...
      Just the info I was looking for...thanks so much!
      Be Jeweled By Candi said...
      I was thrilled when I found this post this morning. I have been looking everywhere for a easy tutorial on how to do this. Your instructions are so easy to understand and very will laid out. Thank you, thank you, thank you!!
      Beaded Details said...
      Thanks so much for the tutorial! I had unsuccessfully tried this before on my own - - then, when a customer asked me to make her a briolette necklace wrapped in this way, I googled & found your tutorial! It was very helpful, and my customer was extremely happy how it turned out! Thank you :)
      Anonymous said...
      Have you heared about a game which you need use Anarchy credits to play, and you can also borrow Anarchy Online credits from other players? But you can buy AO credits, or you will lose the choice if you do not have Anarchy online gold. If you get Anarchy gold, you can continue this game.
      Have you heared about 9Dragons which you need use 9Dragons gold to play, and you can also borrow 9 Dragons gold from other players? But you can buy 9 Dragons gold, or you will lose the choice if you do not have cheap 9Dragons gold. If you get 9Dragons money, you can continue this game.
      Andromache said...
      hi! I have a question for you....so far the tutorials i've found have a hole from left to right of the bead for the wire wrapping.
      I'm attempting to do it with a top to bottom hole (inserting a headpin) but still wrapping the top!
      its really hard, my pliers keep slipping, and the wrapping moves around alot (I'm not using a symmetric bead).
      Do you have any experience in this?
      perhaps you could msg me back
      on etsy: DominiqueD
      Thanks!
      Dominique
      Anonymous said...
      This is absolutely great, the clearest explanation I came across so far ! Thanks a lot, I'm really excited to get started now.
      Hilde (Belgium)
      Leanne of LeanneDesigns said...
      Thank you for your wire wrapping directions, and great pictures! I now know how to wire wrap a briolette! Your jewelry is lovely!
      NeckEnvy said...
      Thank you so much! I've been looking everywhere for this! I appreciate the clear, step-by-step instructions and pics to guide me (lord knows I need all the help I can get lol). You ROCK!
      Deb (Two Cheeky Monkeys) said...
      Thanks so much for these wonderful instructions, I've been struggling to wire wrap without the wire slipping on my Swarovski crystals, but I think I have the idea now!
      Unknown said...
      Thanks for the wrapping instructions and photos. Soooo helpful. I "found" you by accident when I googled "how to wrap a briolette." Then I found out you are an etsy artist... so am I. Haven't sold anything ... yet. You are an inspiration... full time job, full time mom, and talented artist, and selling on etsy... plus a blogger. What an inspiration you are... and helpful too. Thank you!!
      Jenny said...
      Thanks so much, your tutorial helped me a lot! Like others above me, I was searching the web on how to wrap a briolette as well (:
      Estylo Jewelry said...
      Awesome tutorial!

      Sandra - EstyloJewelry
      Unknown said...
      Thanks for sharing your expertise! I'm always so amazed at the look of wire wrapping and have wanted to tackle this technique as a novice jewelrymaker (I'd rather stick to sewing clothes). I really appreciate the tute!!

    Post a Comment