Friday, January 15, 2010

I bought this Cherry Creek Jasper cabochon about a year ago. The muted colors are just gorgeous and I couldn't resist it. It was one of a matched pair of stones meant to be set as earrings but I always knew it was destined to become a ring.
Last weekend I finally decided it was time to create with it. (Yes, I know. It's been a year but sometimes it takes me a while. That's the reason why I have a candy dish full of cabochons waiting to be set!) I sketched out a design that I was pretty pleased with and headed out to my workshop to make a ring.
But something happened along the way. No matter how I tried to replicate the design I drew, something told me to change it. It was almost like the stone was telling me what to do it kept changing the design.
The way this ring turned out is much better than I had planned. I'd never made these little vines before but I really like them! I'm definitely thinking about using them in future works.
Oh, and as a n afterthought, I decided to add a dragonfly to the back of the setting! (I'm getting awfully fond of that stamp! It may be showing up on more pieces.)
For more photos of the ring, click here.
Oh, and for all you MooShu fans, MooShu Monday is coming up. And this time he's going to be dressing up for it!
Do you want to subscribe to my blog by email? Click here!.
Would you like to be a Contrariwise (or MooShu) follower? All you have to do is click on the link in my side bar on the left.
Thursday, January 14, 2010
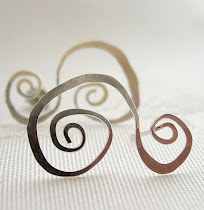
 In yesterday's post, I featured an Ocean Jasper Pendant with a setting highlighted with asymmetrical flowers. I liked those flowers so much, I thought they would make wonderful little post earrings.
These earrings are quite small - only about 6-8 mm across - which make them great for everyday wear. But what I like best about them is that their symmetrical, whimsical feel. (For some more pictures of them, click here.)
Now excuse me because I'm going to change the subject.
This weekend I was reading a jewelry making magazine with a how-to article I thought would be fun to try. (It explained how to use rivets to make cold connections, a new technique I had been wanting to try for a while.)
The materials list was short and since it used copper, I figured it would be a pretty inexpensive experiment in jewelry making.
But then I noticed there was another list, a list of needed supplies.
For the simple pendant, the supply list was amazingly extensive. I added it up and the supplies totaled more than $500!!!
Just for fun, I decided to add up how much in supplies it cost me to make the post earrings above.
Disc cutters for cutting circles to make the flowers: $130
Metal shears (good ones) for trimming the silver : $60
Dapping block to dome the flowers: $50
A stamp to make the circle inside the flower: $10
Misc tools and supplies to solder the silver and posts (these are the cheapo versions): $70
Jewelry tumbler to harden and shine up the earrings: $100
Misc supplies to finish, oxidize, and polish up the metal: $30
Grand total: $450
Wow. Pretty mind-boggling, isn't it.
Do you want to subscribe to my blog by email? Click here!.
Would you like to be a Contrariwise follower? All you have to do is click on the link on the left in my side bar.
Wednesday, January 13, 2010
Ocean Jasper is found only one place on earth: the northwest coast of Madagascar. It can only be seen and collected at low tide and only by boat. Ocean Jasper was named for its location as well how it resembles to the foams of the ocean as it recedes back into the ocean, with its wavy patterns of colors. I bought this beautiful ocean jasper cabochon from StonesInMotion, a seller on Etsy. It has a sparkly green druzy (sort of like a miniture geode!) in the middle of the stone, which makes it all the more special. And if you look closely at the little orange “eyes” , they're surrounded by green "cogs" making them look like flowers. I wanted to use them as a motif, and tried to replicate them as flowers on the setting. But just like the eyes of the jasper, I didn't make them perfectly symmetrical. I think the assymetry gives them a bit of character. Too big for a ring (at least for me - I guess I'm not that daring yet), I decided to set the stone as a pendant. It’s still a work-in-progress because I will add a chain when I get the time. Would you like to be a Contrariwise follower? All you have to do is click on the link on the left in my side bar.
Do you want to subscribe to my blog by email? Click here!.
Tuesday, January 12, 2010
 I really want to make jewelry that's unique - not mass produced - something that can't be purchased on sale at a local department store. By practice and trial, I've learned a lot of things about metalwork over the past year. And I'm trying to put what I've learned into practice.
I made this setting a few weeks ago. The stone is prehnite, one of my favorites. The clean green color always reminds me of sun-drenched water from steams and ponds, and I wanted the setting to reflect that feeling.
I surrounded the stone with cattails. But the pendant was missing something. I thought long and hard about it. And then it came to me - a pond always has some water life around it!
I remembered a dragonfly stamp that I had seen and thought it would be perfect. It took a couple of weeks for me to get it, but I finally got it last night and stamped the design onto the pendant.
To complete the pendant, I offset it with some prehnite beads and a handmade toggle clasp, and finished the entire piece by antiquing it. I'm so happy with the results..
Overall, I think it has somewhat of an art deco look to it! I have a lot of new pieces I've been working on and will be posting about them in my blog this week. Come back and check them out.
Do you want to subscribe to my blog by email? Click here!.
Would you like to be a Contrariwise follower? All you have to do is click on the link on the left in my side bar.
Saturday, January 9, 2010

Click for a bigger image
Do you want to subscribe to my blog by email? Click here!.
Would you like to be a Contrariwise (or MooShu) follower? All you have to do is click on the link in the upper right on my side bar.
Wednesday, January 6, 2010
Ever since I learned how to solder, I've fallen in love in setting cabochons. Rings, pendants, earrings...I just love making them.
As you probably can guess I can buy them faster than I can set them. Therefore, this has resulted in me buying way too many of them. Right now I have a small candy dish full of them.
They're not an inexpensive habit. I probably have several hundred dollars worth. This doesn't quite rival the amount of sterling sheet and wire that I have -which definitely amounts to more than a thousand or so dollars of metal.
(Please note: my husband will probably be reading this, so the figures I quote may be ever so slightly conservative.)
My cabochon stash comes from various sources: I know someone who's cut stones for a hobby for many years... I've discovered several lapidary shops in my local area ... a dealer from Russia frequents a local gem show with some unusual finds...and I scour Etsy for cool stones and great deals. One day while browsing Etsy I found an unusual stone. It was monochromatic and the pattern was odd. Someone else might have not taken a second look..... but I like odd. And the more I looked at it, the more I liked it.
The problem with buying online, is that what you get is often a surprise in one way or another. Sometimes the size isn't really what you imagined. Sometimes the colors aren't what were pictured in the photo. Sometimes, the item is a true disappointment. But, sometimes, the surprise is amazingly pleasant.
When I opened my package from Etsy, I looked at the cabochon and went "huh".
It wasn't a bad "huh".
It was a just a surprised "huh".
The cabochon was......interesting. The more I looked at it, the more I liked it and the more I saw in it.
It took me a while, but I suddenly realized that this stone reminded me of a shard of old bone china with a vintage pattern of roses. And then I knew how I would have to set it. The setting would have to remind one of an old bouquet.
This was beyond what I had tried before, but I was more than willing to try something new. Surprisingly, the design came quickly. It was like the flowers inside the cabochon really wanted to be arranged!
And this is what I created. I call it, Still Life With Roses.
And many, many thanks to Lost Sierra, for his skills in pulling out a wonderful piece of art from a rock (can you believe it!) and allowing me the opportunity to create.
Do you want to subscribe to my blog by email? Click here!.
Would you like to be a Contrariwise follower? All you have to do is click on the link in the upper right on my side bar.
Tuesday, January 5, 2010

After getting everything set up, I spent a lot of time during the holidays working on new designs. In fact, I had so much fun doing that, that I didn't even want to "waste" any time photographing my new jewelry or listing it in my shop.

Do you want to subscribe to my blog by email? Click here!.
Would you like to be a Contrariwise (or MooShu) follower? All you have to do is click on the link in the upper right on my side bar.
Monday, January 4, 2010
My daughter left her sweatshirt on the ground and MooShu found that it was the perfect place to take a nap! Nice and warm, and close to the kitchen where yummy things are often found to fall to the floor.
Do you want to subscribe to my blog by email? Click here!.
Would you like to be a Contrariwise (or MooShu) follower? All you have to do is click on the link in the upper right on my side bar.
Tuesday, December 15, 2009
I'd wanted a disc cutter and dapping block for a long time. If you don't know, a disc cutter will let you punch out circles from sheets of silver. And the dapping block will let you shape the discs into hemispheres.

The least expensive dapping block I could find was at Harbor Freight at $35. When it went on sale for $22.99 I snapped it up. (There it is on the left.)
BUT IT LOOKED SO COOL ON MY SHELF! And it works very well.
Next step was to find a disc cutter.

I was pretty happy at first, but it didn't last for long. After the first 6 or so punches, it wasn't cutting very well. Every disc had to be trimmed and filed. I started hating using it. In fact, I started to avoid using it. And after a very short period of time, it started to rust.


Do you want to subscribe to my blog by email? Click here!.
Would you like to be a Contrariwise (or MooShu) follower? All you have to do is click on the link in the upper right on my side bar.
Monday, December 14, 2009


Do you want to subscribe to my blog by email? Click here!.
Would you like to be a Contrariwise (or MooShu) follower? All you have to do is click on the link in the upper right on my side bar.
Thursday, December 3, 2009

Buy yourself a bench pin. Either with a V cut out, or cut it out yourself. They are invaluable.
Expect to break a lot of blades and don't get upset. Just make sure you buy lots of them. Dozens. Really.
The saw blade should be tight in the saw. I start by inserting the blade on the side of the saw opposite from the handle, and tighten the screw. Then I push the handle into the middle of my rib cage and press (ow), insert the other side of the blade and tighten the screws.
When you quickly pull and release the blade, it should "ping" . (If it doesn't, unscrew the blade, press the handle harder into your ribcage, and insert that blade in the saw taunt.)
The teeth of the blade should point down and out. If you can't see them, you can run your finger against the blade to make sure they're pointing the right way. (Now that you've checked, go back and reinsert your blade the right way.)
When sawing, remember to let the teeth of the saw do the work. Do not push the saw
When sawing, keep the saw straight and not angle it.
Most of the progress in sawing is made on the downward stroke. But it's easier to start your cut by bringing the blade up than down.
When cutting a circle or pattern, move the metal sheet, not the blade.
Use long, even strokes instead of short, quick ones. It will cut much quicker that way. EXCEPT when sawing a corner/angle. Then saw in place with short quick cuts and move the metal sheet, not the blade.
Lubricating your blade often. (I use bee's wax, but there are other products available.)
Read every article you can, on how to use a jeweler's saw.
Remember, it WILL get easier. And, who knows, you might even find that it's fun!
Do you want to subscribe to my blog by email? Click here!.
Would you like to be a Contrariwise follower? All you have to do is click on the link in the upper right on my side bar.
Tuesday, December 1, 2009
 For the longest time, I feared the jewelry saw and I avoided using one. But it you want to do metalwork, you're eventually going to need to saw some metal!
My first feeble attempts at sawing resulted in many broken saw blades. Even trying to saw out a simple figure was difficult. My circles were misshappen, my ovals were eggshaped, and my squares turned out as quadrilaterals.
So I decided that if I couldn't make a simple geometric shape, I better try something different.  Fluid forms might not be too bad - I could disguise the fact that I couldn't cut a straight line. And they're pretty interesting and make the back of a pendant seem a little bit different.
So I started cutting out wavy patterns on the backs of my pendants. After a while this got easier and I began to break fewer saw blades. The other day, I bought the cabochon you see on the right. To me, the pattern of the stone looks like trees on a mountainside, with misty hills in the background. I planned to bezel-set this stone in a pendant, and as I soldering the bezel in place, I suddenly got an idea: I would saw out the back of the bezel in the shape of a leaf!
For someone who'd never sawed anything more intricate than some rounded shapes, that was a pretty daring idea.
So I took my sharpie, drew a leaf, chose my blades, and began sawing away.
And this is what I got: (Look ma, it took only 6 blades!)
Let me tell you, I learned a lot by just doing this and I've gotten pretty comfortable with my jeweler's saw.
The pendant is still a work in progress but I promise to post some pics when it's finally done.
Do you want to subscribe to my blog by email? Click here!.
Would you like to be a Contrariwise follower? All you have to do is click on the link in the upper right on my side bar.