Thursday, November 20, 2008
 Just thought I'd share a couple of new pieces in my shop. Both were made this week
The first are these Hoops Within Hoops. (It's my temporary name, so please forgive it. If you want to suggest a better one, I'd appreciate it.)
If you're a regular reader of my blog, you'll know that I recently learned how to solder. And I've been having lots of fun since. These earrings are the result of me having fun soldering rings of sterling wire.
Instead of just single rings of sterling for each hoop, I wanted to have multiples.
The earrings turned out almost exactly like I envisioned them. Except for one thing:
I originally planned to have the rings be perfectly smooth circles. But when I made the earrings that way, I thought it was boring. You can buy slickly manufactured earrings at any kiosk at a mall. I wanted to make sure that there was a human element in these earrings. I handmade them, they should have my stamp!
So using my ballpeen hammer, I hammered them dozens of times (although it seemed like hundreds and may well have been!) to give them a more personalized look.
In the process, I found that the textured silver really reflected the light, making these earrings sparkle with every movement. The send pair uses gemstones from the Bead Porn purchase I recently made.
These facetted natural citrine briolettes are the color of warmed honey. They look great all on their own - on my own custom earwires.
And I suddenly realized that they happen to be the November birthstones. I call them "Warm Gold and Cool Silver".
Now what I haven't shown you, is a 3rd pair of earrings I made this week that were a FAILURE. They, of course, haven't been listed in my shop.
As it's been said, the good comes with the bad. You can't expect designs to go right every time. And I'm planning to show you those -and what went wrong with them- in a future post.
Perhaps you'll be able to learn from my errors. Or at least laugh at them.
Check back with me tomorrow. I'll be having my weekly feature: Crafts, Tutorial, and More! It's my opportunity to share with you the best (and oddest) things I've found on the web in the past week!
Do you want to subscribe to my blog by email? Click here!.
Would you like to be a Contrariwise follower? (I love having more friends!) All you have to do is click on the link in the upper right on my side bar.
Wednesday, November 19, 2008
Etsy tips for a better shop: Periodically update your photos and listings
13 comments Posted by Contrariwise at 12:01 AMJust because you've listed an item on Etsy, doesn't mean the listing is carved in stone.
I'll often go through my listings and look for opportunities to improve them or update them.
Let me give you a couple of examples.
Updating descriptions and titles Your listing description shouldn't say that your beautiful handmade item has a lovely pastel palette perfect for Easter - in September!
If you have a seasonal description, you should update it seasonally. The above was a really blatant example, but season descriptions can creep in subtly. Minor changes to make your listing "fresh" can make a difference.
Last Christmas time, I listed the earrings on the left under the name of "Christmas Kisses", complete with a holiday-themed description. I ended up selling quite a few pairs . But I didn't want to stop listing my "Kisses" in my shop - they really can be worn any time of the year. So, after Christmas, I renamed them "Valentine Kisses" and wrote a season-appropriate description.
That worked very well and I did sell several pairs for that holiday.
Take opportunities to improve your photos My Dangling Swirl Earrings were originally available in my shop a couple of months ago. Even though I had photographed them several times, I was never happy with the photos. On the right is my original listing photo for them. Yes, they've sold twice and I've relisted them, but I thought the photo needed major improvement.
I was recently playing around with my lightbox - changing the lighting and  experimenting with different backgrounds. I wanted a background that would complement sterling silver. I tried various colors of cardstock, pieces of wood, tiles, different types of stones, etc - then I tried a placemat with rich dark colors. (Placemat??!!) I really liked the deep color and the way silver seemed to pop against it. It also subtly evokes the holiday season.
I went back and took new photos of the Dangling Swirl Earrings and I am so happy I did. You can see the new photo on the left.
Now I feel the photos represent my earrings better - and I don't cringe every time I look at them.
Do you want to subscribe to my blog by email? Click here!.
Would you like to be a Contrariwise follower? (I love having more friends!) All you have to do is click on the link in the upper right on my side bar.
Tuesday, November 18, 2008
I bought some beautiful faceted crystal quartz when I was in Rome recently. I love the way the light hits the many facets and bounces off of them.
I've used them to make some earrings, highlighting them in a herringbone weave made of sterling. (You can see them here.)
But this weekend it suddenly struck me that they would be great as the focal for rings. (Palm hits forehead! Duh!) I made a wire wrap ring, with the intent to oxidize it.
I personally like the antiqued look in jewelry. When I look at photos of jewelry, I'm always drawn to those that are antiqued. The contrast between the highlights and the shadows gives the jewelry interest. But I'm not sure most people like the oxidized look. (I've also heard that a shiny silver usually sells better in shops on Etsy.)
After I finished wrapping the stone, I found I liked the way this ring looked with the bright polished silver. (There it is on the right.)
Shiny shiny shiny. The bright sterling in the same color tone as the quartz.
I could definitely see myself wearing this at Christmas decked out for the holidays - and it sparkling on my fingers. But since I really had planned to oxidize the ring, I went ahead and did it.
On the left is the exact same ring, oxidized and rubbed with fine steel wool to bring out the highlights.
Hmmm. I'm unsure. I thought the oxidized finish would contrast with and bring out the sparkling quartz. But it seems to me that the stone reflects the dark tones more. Not bad, but different than I had imagined.
What do you think? Which do you like better?
Do you want to subscribe to my blog by email? Click here!.
Would you like to be a Contrariwise follower? (I love having more friends!) All you have to do is click on the link in the upper right on my side bar.
Monday, November 17, 2008
Pickle. It's what's for soldering. Also good on sandwiches.
13 comments Posted by Contrariwise at 12:01 AMA funny name, isn't it.
When you solder silver and other metals, they get darkened and crusty. To clean them up, you dunk them in an acidic solution commonly called pickle.
My soldering station is not well set up and I've been putting my pickle in a little glass cup. But it evaporates quickly and I have to make fresh solution frequently.
I decided that the next time I have a good-sized jar that's empty, I'd recycle it and use it to store my pickle.
Guess which jar was next?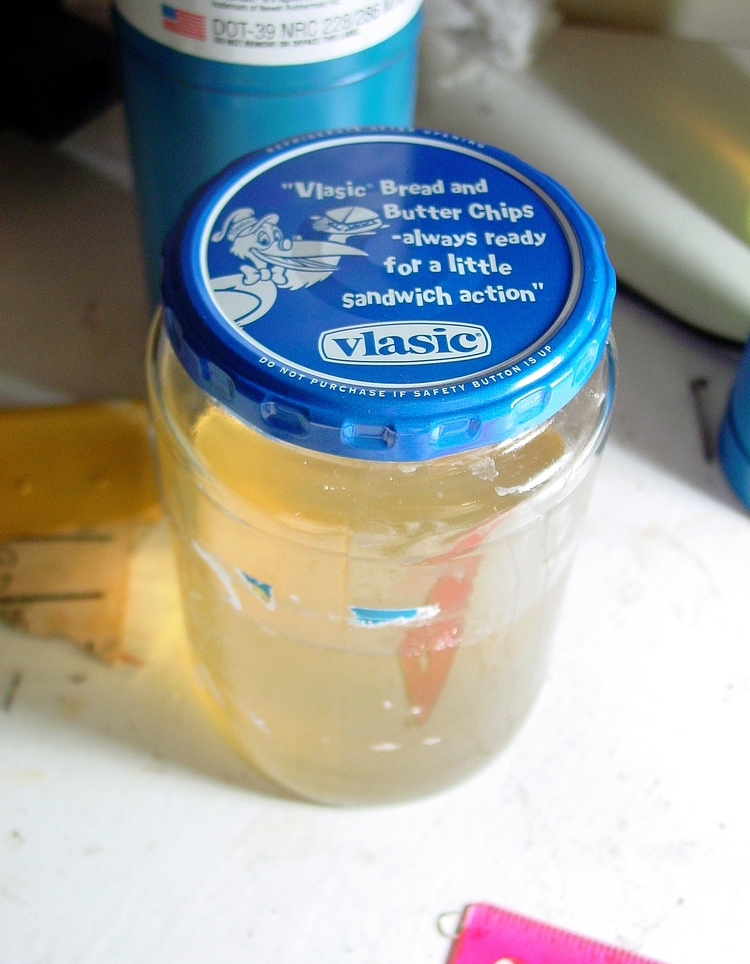
Do you want to subscribe to my blog by email? Click here!.
Would you like to be a Contrariwise follower? (I love having more friends!) All you have to do is click on the link in the upper right on my side bar.
Saturday, November 15, 2008
Ancient Earring is As Beautiful in the 21st century as it was in the 1st.
8 comments Posted by Contrariwise at 12:01 AM
Friday, November 14, 2008
Crafts, Tutorials....
I was a deprived child and never had Shrinky Dinks to play with. (Too dangerous. I might have blown myself up with the gas oven. )
Starting with plastic boxes from strawberries....

....you cut out shapes and sand them lightly...

then pop them into the oven to create cute litle bits like this.

(BTW, she also has an awesome Etsy shop, TyrannyOfTheHandbags. Check it out.)


What the...????

AWK! LITTLE TERRIFYING ECSTATIC FACES, HIDING IN THE TEENY TINY BROCCOLI BITS.

Do you want to subscribe to my blog by email? Click here!.
Would you like to be a Contrariwise follower? (I love having more friends!) All you have to do is click on the link in the upper right on my side bar.
Thursday, November 13, 2008
Earlier this year, I had the pleasure of having Mooch, my daughter's sock toy,accompany me on a business trip to Rome. (You can read about how this all came about, here.)
Well after that trip, Mooch developed wanderlust - it was nigh impossible to keep him from accompanying me from my next trip to Europe. This time it was Vienna
Despite the fact that we were a bit jet-lagged, we decided it was better to stay awake on the first day than take a nap. So we decided to visit one of Vienna's most famous tourist destinations, the Summer Palace, Schloss Schonbrunn. It once was the home of Marie Antoinette:
We also climbed (...OK...took the elevator) to the top of St Stephen's Cathedral to see a great view of the city of Vienna:
Vienna boasts an old clock that rivals the finest in Germany. The clock shows the time by historical figures that move across the clock face. Every hour a different historical figure passes by. Mooch was thoroughly impressed:
While touring one of Vienna's museums, Mooch had a harrowing adventure:
He narrowly managed to get out of his predicament and was a bit upset, as one would expect. A relaxing evening helped and, don't worry, he's none the worse for wear.
Despite his one scary experience, Mooch had a great time and is looking forward to his next great adventure.
Do you want to subscribe to my blog by email? Click here!.
Would you like to be a Contrariwise follower? (Mooch and I love having more friends!) All you have to do is click on the link in the upper right on my side bar.
Wednesday, November 12, 2008
A reflection on my first year of making and selling jewelry
19 comments Posted by Contrariwise at 12:01 AMOn Tuesday I received an email from someone I didn't know who had seen my jewelry in my online shop on Etsy. She wrote that she found my work inspiring and that she wished she lived closer to me so that she could learn from me.
That was really amazing to receive. And it was very humbling. (I mean, did she really write the email to the right person???)
You see, I've only been making jewelry for a short while, and only in the past year I've been able to  devote significant time into it.
Most of my techniques been self-learned and, therefore, as you can imagine, a lot of trial and error has gone into my designs. But, then again, it's amazing how many designs just seem to create themselves. It's almost like I'm just the medium for them to come through.
I opened my Etsy shop about a year ago. My husband was concerned that my hobby was getting out of hand and that I was spending too much money on it. So I thought that if I could sell a few things, I could use the money toward my hobby. I already knew about Etsy, a website that only sells handmade items and supplies, and thought I should give it a try.
I opened my shop and soon my jewelry started to sell. In fact, sales were better than I ever expected and I've used a lot of the profits to buy tools and materials that I would otherwise never have afforded. With these tools, I had the opportunity to learned new techniques. When it comes down to it, Etsy has had a direct positive impact on my craft and also on my life.
The kindly e-mail I received made me reflect on where I had been a year ago. There's been so many new things I've learned ! I decided to make a list and share it with you. (With most of the items on this list, I've tried to hotlink a related article for you to read about further if you're interested.)
So let me begin. In no particular order, a year ago I didn't know how to:
- Blog. I didn't have a blog and didn't know how to set one up. I didn't even know about blogger.com or other blogging sites. Since then I've learned enough to be confident to share tips and hints. Hey, and I can even use html. (OK. Maybe just a little.)
- Use the macro setting on my camera. Yes, I really only recently discovered it and it has made all the difference in my jewelry photograpy ! I've even written tutorials about it on this blog.
- Make a light box and use it effectively. (Or even know exactly what a lightbox is.)
- Edit photos with a photo-editing program. This includes learning about cropping, using the proper light balance and exposure, etc.
- Make my own headpins and jump rings. I hate to admit it, but I didn't even feel
 comfortable closing a jump ring properly. But I learned how they can be used to make simple chains ! And then I learned to make fancy links for more elaborate chains.
 - Make my own earwires instead of
 buying them, so that they would be a part of the integral design of a pair of earrings. (I think this adds a special touch and give earrings a custom look.)
 - Wire-wrap briolettes -and even create a tutorial on how to do it! (This has been one of my most popular posts.)
- Market myself and my jewelry through the internet. Before this, I never had an account on Flickr or even looked at a classified listing on Craigslist, let alone post on it. (If you're interested, I wrote about my experiences promoting on etsy and also promoting outside of it. )

- Make post earrings
or hoops with posts. - Develop skill at handforging silver, a fancy name for hammering metals. (Which, by the way, is very satisfying after a long day at work or after dealing with two teenagers.)
- Except for simple loops, know how to do wirework, for example,
herringbone wraps - Oxidize silver and polish it to create an antiqued look. (And here's a link on how to do it using eggs.)
 Solder (a HUGE accomplishement for me) and be able to Bezel-set stones to make pendants or rings
 Polish metals using sandpaper, a rock tumbler, or a polishing wheel. (The rock tumbling story is one of my favorites. It definitely falls in the TRIAL and ERROR category.)


- Use a gas grill to make jewelry. (This story is almost as good as the one about the rock tumbler.)
- make clasps for necklaces or bracelets
 Use a ring mandrel and make a wire wrapped ring

Now that I've had an opportunity to look back on what I've learned in the past year, I feel a sense of accomplishment. I also look forward to what the next year will bring and feel excited that I might learn even more.
Do you want to subscribe to my blog by email? Click here!.
Would you like to be a Contrariwise follower? (I love having more friends!) All you have to do is click on the link in the upper right on my side bar.
Tuesday, November 11, 2008
I've been working on a necklace for the past 2 weeks. It's made of varying sizes of large intertwined hoops made of handforged and oxidized copper and has been driving me crazy!
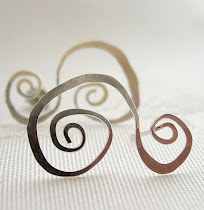
 As I was going through my stores of sterling, thinking about what I need to order for future projects (since the price of silver has plumetted), I suddenly had an urge to make some hoop earrings.
 What if I swirled the ends a bit? (Hmm. A bit tricky with this thick silver. It's so hard to bend.)
 All these thoughts were jumbling around in my head as I stared at the cirles of wire in my hand. And all of a sudden, in an incredibly short period of time, the design for these earring came about. (Isn't the creative process amazing!)
Do you want to subscribe to my blog by email? Click here!.
Would you like to be a Contrariwise follower? (I love having more friends!) All you have to do is click on the link in the upper right on my side bar.
Friday, November 7, 2008
Friday Download Nov 7: Crafts, Tutorials, And More!!!
17 comments Posted by Contrariwise at 12:08 AMAnd, once again, here's my regular Friday feature.
Crafts, Tutorials.... Gradient Button Necklace
- buttons of varying sizes
- embroidery thread

- chain if desired

Instructions
Lengths of chain can also be tied to each side of the necklace if desired.
 Advent Calendar
Bubbly funk has instructions on how to make this advent calendar using old matchboxes!
 This interesting diy idea comes from mollie dash and her boyfriend, Bryan.
  Bryan decided to make this chandelier from packing peanuts- something some of us accumulate more often than we’d like.
 Dane Carlson from Business Opportunities Weblog created this little applet which computes and displays your blog's worth based on Tristan Louis's research into the value of each link to Weblogs Inc.

 via
viaDo you want to subscribe to my blog by email? Click here!.
Would you like to be a Contrariwise follower? Then please click on the link in the upper right on my side bar.
Contrariwise Jewelry is now a proud member of Metalsmiths in Action: http://metalsmithsinaction.webs.com/index.htm
Wednesday, November 5, 2008
Part 2. Blogger Following to increase traffic to your blog
4 comments Posted by Contrariwise at 12:01 AMPart 1 of this series discussed adding a feedreader to promote your blog. Today, the topic is Blog Following.
Recently Blogger added a new feature that allows you to subscribe to other blogs that you find interesting. It's called the Blogger Following feature. You can easily browse the blogs you follow as well as the blogs that follow you, see their posts, and check out the blogs they’re following.
So, ultimately, this is a great way for all of us to promote each other’s blogs.
Adding a follower widget in your sidebar makes it easy for others to follow your blog! And it's so easy.
How to add a follower widget
(1) Login to your Blogger Account
(2) Go to your Layout Page Elements tab
(3) Click “Add a Gadget”
(4) Select “Followers” from the gadgets list.
(5) Save
The Follower Widget will now be in your sidebar. It shows the profile pictures of your followers and gives your readers a “Follow This Blog” link to join up, too.

With a click on the followers icons, you can read their profiles, scope their blogs and posts, and check out the other blogs they’re following. (What fun! )
Plus, the new posts of the blogs you follow will pop up on your reading list in your dashboard. It's an easy way to keep track of a favorite blog and not miss any new posts.
How to follow a blog that has no Follower Widget
If you find a blog you like and want to follow it, but they don't have a Follower Widget in the sidebar, you can still follow it. Here's what you need to do:
At the dashboard you are given the ability to follow other blogs, even if they’re not hosted at blogger.com:
(1) Login to your Blogger Account.
(2) On the Dashboard under the Reading List section, click on ADD Button.
(3) Enter the URL of the blog you would like to follow and choose NEXT. If the blog you just followed is hosted at blogger.com your avatar will be included in that blog’s followers list.
(4) Choose whether you would like to follow publicly or anonymously.
(5) Now the newly added blog will be seen on your Dashboard's Reading List.
Do you want to subscribe to my blog by email? Click here!.
Would you like to be a Contrariwise follower? Then please click on the link in the upper right on my side bar.
Contrariwise Jewelry is now a proud member of Metalsmiths in Action: http://metalsmithsinaction.webs.com/index.htm
Tuesday, November 4, 2008
I've been traveling a lot lately and I haven't been working as much on my jewelry. In fact, I've tried to slow down sales in my online shop by purposely decreasing my inventory and not adding new jewelry because I just haven't had the time to keep up with sales. (Sigh.)
But this past weekend I decided to be selfish and devote a little time to my jewelry. (And me.) . And so FINALLY, I made some new pieces using some of the gemstones I bought recently.

 The ring on the right features a prenite cabochon which is absolutely luminous! (I think this is now one of my favorite gemstones.) I can't say enough about this stone. It has an amazing glow. When I look at it I think of sunlight shining through a pool. I bought only 2 of these prehnite gemstones at a recent Bead and Gemstone show. I now wish I had bought more.
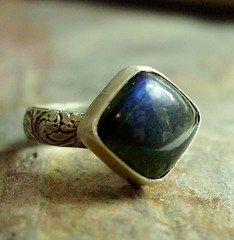 The ring on the left incorporates a square labradorite set at an angle. When the light hits this gemstone just right, it flashes a deep bright blue that seems to glow.
I love labradorite gemstones, but you rarely find high quality ones. Most are dull grey unless the light hits them just right. This one, however, is a dark, dark blue even when it's not flashing. I got it at Best Beads, a shop on Etsy, and I know I'm going have to go back for more.
Did you notice the bands on the rings? Several months ago, I bought this textured wire at Thunderbird Supply and have been waiting to use it for rings. (These guys should give me a discount. I can't believe the amount of money I've been spending there - oh, but it's worth it.) The pattern is gorgeous and I brought out the details by oxidizing and then polishing the sterling. Overall, the silver is very bright, but the antiquing really make the pattern pop.
Let me just say that it felt great to get back to my workbench again.
(And stay tuned for tomorrow's post: more blogging tips on how to increase your blog's visibility and readership!)
Do you want to subscribe to my blog by email? Click here!.
Would you like to be a Contrariwise follower? Then please click on the link in the upper right on my side bar.
Contrariwise Jewelry is now a proud member of Metalsmiths in Action: http://metalsmithsinaction.webs.com/index.htm