Thursday, May 6, 2010
One can never be too thin, too rich, or have too many cabochons
11 comments Posted by Contrariwise at 12:01 AMI used to keep all my cabs in a candy bowl. Everytime I got a new one, I'd drop it in. Then when I wanted to design a new piece of jewelry, I'd start rummaging through the bowl to find what I wanted.
This was OK for a while, but when my collection grew, I started forgetting about what I had. And sometimes cabs would be missing because it was so easy to leave them lying about all over the house.
When I showed my cabs to someone, I'd just spill out the contents of the bowl on a table and we'd sift through all the pretty stones. Fun, yes, but not very efficient or professional.
What to do with them?!
I thought of organizing my cabs in those acrylic organizer boxes that are used for beads or embroidery thread. But that would just mean that the cabs would still be strewn in little containers - just more of them! Then a friend of mine suggested using a scrapbook. Why didn't I think of that!
I found a couple of scrapbooks for $1.99 on a clearance rack. These look like photo albums but have clear plastic sleeves that you can slip things into.
And I found the best time to do a little organizing. Our family was planning a long car trip, so I brought along my cabs and the scrapbooks for the ride. Rather than sitting around bored or looking at scenery, I spent several hours happily organizing the cabs into the books and labeling them:

The cabs are roughly organized by color or type of stone and each has been labeled with the type of stone, where it was purchased, and how much I paid for it. I secured them with double-sided foam tape which holds the cabs firmly, but allows me to easily pull them off when I need to. Plus they're protected in the plastic sleeves. These scrapbooks are expandable which is helpful, as the cabs are bulky and they're easy to page through.
And, happily for me, I still have plenty of room to expand.

Do you want to receive my blog by email? Click here!
Would you like to be a Contrariwise Follower and see what trouble I might be up to or what I'm working on? All you have to do is click on the link on the left in my side bar.
Tuesday, April 22, 2008
Fun with Google Maps; mapping sales and contrariwise friends
2 comments Posted by Contrariwise at 10:54 AMI've been playing with Google Maps recently. Did you know there are hundreds of websites are dedicated to creating “mashups,” which mix Google Maps, with other kinds of data to create websites that are sometimes informative, sometimes entertaining, sometimes ridiculous, and always interesting. For example,
- you can use the New York On Tap bar and subway map (newyorkontap.com/Subways.asp) to find great hotspots in the City That Never Sleeps. (And then, since you’ll be in no condition to drive, the map also shows you the nearest subway station.)
- Are you a runner? Or do you want to know how long your hike was the other day? You can use the Gmaps Pedometer (gmap-pedometer.com)
to digitally retrace your steps. - And saving you from a potentially embarrassing situation, there’s Urinal.net (urinal.net/google_map.html), which will help you find a place to do your business anywhere in the United States.
- For more, here's 100 Fun things to do with Google Map Mash Ups
So, I thought, what can I use Google Maps for?
I started by mapping my sales. In the past 7 months, this is where my jewelry has been mailed to:
 As expected, most of my 174 sales have been shipped to customers in the US. But I've had a fair number of shipments globally. (And I found vast, untapped areas in the world that have been deprived of my jewelry! I need to increase my marketing efforts in South America, Africa, and Asia! LOL)
I also thought it would be cool to creat a google map for my friends. Just click on Contrariwise Friends, below. It'll bring up an interactive map. I'd love it if you 'd add yourself to this map and write a comment!

(If you'd be interesting in subscribing to my blog and receiving it by e-mail, just click Subscribe to Contrariwise ramblings by Email.)
Thursday, March 6, 2008
When I opened my online shop, I thought that I would just list some jewelry and people would come by and buy. How difficult could it be? After all, look at all the successful sellers on Etsy!
It wasn't until I started reading the Etsy forums that I realized I really had to promote my shop in order to have it noticed and to sell.
Wow! This meant commitment! I wasn't entirely prepared for that.
So I quickly read everything I could find on the internet about Etsy. Much of it was helpful and it really turned my thinking (and promoting activities) around.
I'll divide promotion into two parts. Both will hopefully result in improved sales and are only based on my personal experiences and opinions on promoting within Etsy.
- What you can do within Etsy to get your shop noticed.
- What you can do outside of Etsy to draw people to your shop.
1. List often.
If possible, list an item daily. This gets you exposure on Recently Listed Items on the front page as well as in the Time Machines on Etsy. It also means that when someone runs a search, you're closer to the top of the queue of their results. (Personally, I like to list twice a day if I can.)
If you don't have anything new, consider relisting an item. (Just don't get OCD about it. Even though its only 20 cents per listing, this quickly adds up.) In addition to bringing you back up in the queue, it brings your item to the top of your shop listings, which means more people might notice it if they're just scanning your shop. (Most of my sales come from the 1st page. I think only really committed buyers look beyond the first two pages of your shop.)
Unless you're opening a shop or are a really prolific seller, don't post a lot of items at once. Space them out during the day for maximum exposure.
2. Post on the Etsy forums.
Get out on those forums and have people see you, recognize you, and associate you with your shop. You'll meet people and see shops you wouldn't otherwise. Plus lots of good advice can be found there.
People rant about the Promotions forum, but I've sold more than a few items that way. It's not going to hurt to announce your new items in the promotions forum. You'll get some additional views (a big thing for a newbie) and you'll get your shop noticed.
3. Good photos and thumbnails
This is unbelievably critical. See my earlier posts about photography tips and drawing the customer in with great thumbnail photos.
3. Good descriptions in your listing.
Other than your photos, this is all your customers have. They can't touch your wonderful handmade item, or smell it, or taste it, or try it on. You have to describe it. Give measurements and details, state clearly what an item is made from, and don't forget to check your spelling.
Also, it doesn't hurt to have a little fun. Suggest some uses. Share your inspiration. Show some personality. And, every so often, change the descriptions. (When someone is looking at your item in March, you don't want the description referring to the wonderful autumn colors of your item.)
4.Get feedback
Ask for a critique in the Promos and Critiques forum and then genuinely consider the constructive criticism offered.
When I first started, I thought I had great photos. Most of them were created with a scanner and had busy backgrounds. Early on I asked for feedback on the forums and discovered that most people were not as enamoured with my photos as I was. I spent A LOT of time learning to use my camera to create more effective photos and am very thankful for the constructive feedback I received.
5. Proper tagging
Make sure you have the most specific titles and tags available, that clearly describe what your product is, and in some circumstances, who would use your product. You are allowed up to 13 tags; use as many as possible. It makes it easier to start with the most general tags, then narrow it down.
For example, if you sell a sweater
- sweater (item)
- wool (material)
- cardigan (type)
- cable (type of knit)
- blue (color)
- tan (color)
- stripe (design)
- medium (size)
- fitted (style/fit)
- classic (style)
- feminine (style)
- casual (occasion)
- office (possible use)
That's 13 words.
6. Pricing
I'm only giving a buyer's perspective about prices (because I could write a whole post all about how to set prices - but that's an entirely different topic):
If you underprice, a buyer may think something is wrong with your item or that it's poorly constructed. If you overprice, the buyer may think you are gouging. Either way you will lose. Check what similar items are selling for on Etsy and price fairly and accordingly.
7. Etsy Showcases
I've never featured an item in one. The consensus seems to be that they will bring your shop views and hearts, but little or no sales.
Just think, it costs $15 to have an item in a showcase. For the same money, you could relist an item 75 times! Think of the exposure THAT would get you!
My next in this series of Lessons Learned will be about promoting OUTSIDE of Etsy.
If you'd be interesting in subscribing to my blog and receiving it by e-mail, just click Subscribe to Contrariwise ramblings by Email.
Wednesday, March 5, 2008
It took me a lot of trial and error to get my photos to an acceptable stage. (I say "acceptable", because there is always room for improvement.)
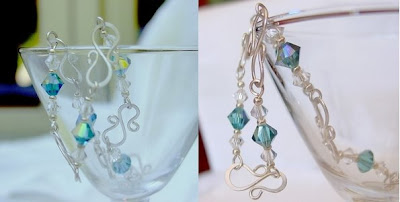
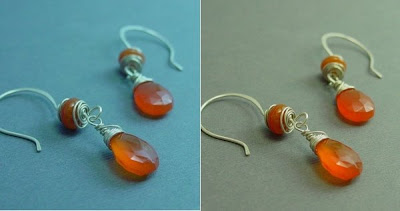 Makes a huge difference, doesn't it. Not only is the background close to the original color, but now the gemstones really "pop".
2) Control the exposure time of your pictures. This is useful if your photos are extremely washed out (too much exposure) or dull/dark (too little exposure). The range on most cameras is -2 to 2 and is usually set to 0 by default. A setting of +1 is a good place to start.
Here is an example in a lightbox. The exposure for the left picture is +1, the middle is 0, and the right picture is at -1. Depending on the ambient lighting and the background, the optimal exposure will vary.

In this case, a setting between +1 and 0 would probably be best.
3) Use optimal lighting. Natural diffused daylight is best. 2nd best is a lightbox. (Never use your flash, at least on jewelry- it can create a one dimensional washed out look.)
Get a lightbox or make one. Then you won't have to rely on the sun all the time. It's easy to make one; here's a few links.

4) Use the macro setting on your camera if you are photographing small items or want to take detailed close-up shots. (The icon is a little flower.) This setting helps your camera focus on small details within your image. You will either need a really steady hand or you might consider using a tripod.
Here's an example of the kind of detail you can get with the macro setting. Guess which picture was taken using the macro lens setting!
 With out the macro setting, I would have to take the photo several feet farther from the item. I would lose detail, even if I cropped the photo severely.
5) Use a photo editing program. A photo can be saved with cropping and brightening. Some things I usually use to improve my photos are increasing contrast, gamma correction, increasing or decreasing the saturation, and sharpening.
Photoshop is a great program for editing. But some free (and simpler) programs include Picassa and Photofiltre.

This made a huge difference. The colors in the background and in the rose quartz stone are now true. The result is that this photo almost doesn't look bad!
Here's a few great examples that I found on Etsy. (You might be able to recognize a couple of sellers from their photograpy.
 If If you find something that works, stick with it. A lot of successful sellers have unique styles that make them instantly recognizable. (I haven't acheived this yet, but I'm still working on it.)
7) Look on Etsy for ideas! There's a lot of great inspiration out there.
If you'd be interesting in subscribing to my blog and receiving it by e-mail, just click Subscribe to Contrariwise ramblings by Email
Monday, March 3, 2008
Selling on Etsy: using your photos to draw in more views
13 comments Posted by Contrariwise at 8:41 AMI think everyone has heard the saying, the 3 most important things in real estate are location, location, location.
In my personal opinion, there should be a parellel saying in Etsy: The 3 most important things for selling on Etsy are photos, photos, photos.
Not just any photos. They have to be really good. The problem with buying online, is that your customers can't see or touch your wonderful handmade items in person. All they can see is your photograph and read your descriptions. So good photos are VITAL to making a sale.
You're allowed up to 5 photos in each Etsy listing. Why not use them all? Take pictures at all angles and make sure they can see the entire item. This can only help your customer understand how wonderful and unique your creation is.
Make your primary photo, the one they see when they're browsing your shop, interesting. It should draw people in. You don't necessarily have to show the entire item in the photo. You can tease the viewers and make them want to see more.
One way to gauge how good your photos are, is in the number of views you get immediately after listing an item. Better and more interesting photos will get more views.
Here's an example of what I mean.
This is my primary photo for my Grape Gumdrop Earrings. This is the photo that you see in my shop listings. It's interesting and colorful and makes you want to see more. When you click on it, it takes you to photos that show the entire item:

 These photos are not that artsy or fancy, but they give you a clear idea of what the entire earrings look like, how they would hang, and approximately how big they are.
Tomorrow's post will be on how to take better photos, something I had to learn the hard way.
If you'd be interesting in subscribing to my blog and receiving it by e-mail, just click Subscribe to Contrariwise ramblings by Email
Saturday, March 1, 2008
I've been selling jewelry on Etsy for about 5 months. I've really been surprised at the number of pieces I' ve sold. Right now I'm averaging about a sale a day! That may not seem like a lot to most people - I'm definitely not making a fortune. But I didn't intent to support myself. I was just hoping to break even on the costs of a relatively expensive hobby. Plus, Etsy was an easy first step in learning about selling on the internet.
In case you're interested in which are my top selling items, the top 3 sellers in my Etsy shop are:
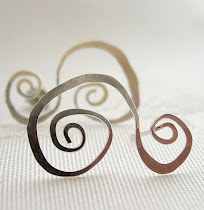
1. The Unfurling Earrings 2. Minimalist swirls

Thursday, February 28, 2008
Back in November I blogged about how much I wanted to make my own silver headpins, the kind with little balls on one end of them. Since I don't know how to solder, and since I was obsessed with wanting to make headpins, I resorted to using my GAS GRILL to make some. (Here's the link to the original tale. )
 Together with the butane , this little baby only set me back about 25 dollars.
 So what could I stick the wire in to make it stand up so I could flame it?
 Despite my optimism for the Benzomatic, I wan't exactly happy with the results. So I decided to return it and get something BIGGER.
Oh yes. I went out and bought myself a butane torch. So please look forward to hearing about my new adventures. I'm sure I'll be blogging about them soon.

Monday, February 11, 2008
Submitting your url to search engines is supposed to increase traffic to your website. I found this list of Search Engines on Tips for New Bloggers. You may submit your site URL to these search engines for Free.
Google
Yahoo! Search
Microsoft Live Search
Alexa Web Search
Baidu (Chinese search engine)
ExactSeek
SearchSight
Scrub the Web
EntireWeb
Gigablast
Exalead
SearchKing
whatUseek
AnooX
Splat Search
Walhello
SearchIt
email Mozdex
Jayde
Infotiger
Abacho (European search engine)
Submit-one
TowerSearch
HotLaunch
Shoula
The-search-site
Websquash
Unasked
eVisum (educational resource)
DinoSearch
SearchRamp
SearchtheWeb
SearchWarp
Mixcat
BestYellow
Beamed
I've submitted Contrariwise Ramblings to most of these. I'll let you know if I see any more traffic. (But some of them claim that it might take WEEKS to add your website to their search engine!)
Friday, January 18, 2008
When I create a new jewelry design, I'll often only make one piece. I might wear it to see if there are any problems with it. (Will the clasp hold? does the necklace hang properly? ) Before making multiples of the same item I might show it around to gauge interest or list it on Etsy to see if it sells .
 When I'm finished I photocopy the jewelry. Unlike a photograph, a photocopy will give you a better idea of dimensions since it's at the same scale as the jewelry.

Tuesday, November 13, 2007
A while back while I was out on a garage sale run , I found a toy rock tumbler -the kind that you can buy at Michaels Craft Stores - for only $3.00.
It didn't look too bad. According to the seller, the tumbler was never used, but the little rocks and the grit were missing. But, all in all, not a bad deal. I thought my 10 year old would like to try it or maybe I could use it for something.
Well a couple years passed and the tumbler collected dust in the front closet.
I had always heard that tumblers are great for silver jewelry. They supposedly shine silver up and harden it. Since I make a lot of silver jewelry, it sounded like it might be worth a shot.!
Next step: find out what I need to know about tumbling silver jewelry.
Google, of course comes in handy. I found this site that tells you just about everything you need to know about tumbling silver: http://urbanmaille.com/articles.asp?id=148 Armed with the information, I am ready to begin.
First. I already have a tumbler. (So what if it's plastic! No snickering!) It looks simple enough and seems to work all right without anything in it..

Next, I need to get some steel shot - probably about a pound worth. After checking some sites, I realize that I will be paying more for my steel shot to FILL the tumbler, than I PAID for the tumbler itself. Plus there's a shipping fee for mailing a whole pound of stainless steel shot across state borders. This is getting expensive.
So, $24 later I have my steel shot:

I guess it must be dirty because the directions say that I'm supposed wash it before I use it with jewelry.
??? So what should you use to wash steel shot with???
Well, I have a colandar. I checked the holes and decided that the shot PROBABLY wouldn't go through them. But...what a minute... using a colandar would mean I would have to put it and my steel shot in my sink and run water over them. Not a good idea. I don't want any steel shot going down my sink and into my garbage disposal! Bad idea!
What else? Let's see, I have some stainless steel mixing bowls. I can fill one up with soapy water, put the steel shot in it and swish it around. The shot could be washed on my countertop and not on the sink.
OK! Let's go!
So I got my bowl, put some warm water in it, and placed it around five feet away from my sink. Opened up my steel shot and started pouring it carefully in the water. Well, those steel shot are pretty heavy, and they seemed to gather some speed while I was pouring them in. All of a sudden -SWOOSH!
Do you know what happens when steel shot hit a steel mixing bowl. They start bouncing. About 5 of them bounce out of the bowl, and wouldn't you know those suckers bounced right across the counter top straight for my sink, with me scrambling after them and trying to catch them before they reached it.
I managed to catch two. You KNOW where the others went.

Yes, there're down there.
No, I can't get them out.
Yes, I have to tell my husband something.
The plumber was called the next day. I was lucky. The housecall only cost $120 because we didn't need a new garbage disposal. That would have been at least another $150 more.
In the end:
Rock Tumbler: $3
Steel Shot for said tumbler: $24
Plumbing bill for steel shot in disposal: $120
Look on my husband's face when the plumber handed him what was stuck in the disposal: priceless.
Friday, November 9, 2007
Did you know you could make jewlery using a gas grille?
3 comments Posted by Contrariwise at 8:40 PMI want to learn to solder so badly and also be able to make silver headpins with little balls on them. I have asked for a propane torch for Xmas but my darling husband tells me that no way he could conscience giving me one, due to my propensity toward absentmindedness.
I've read that you can use a gas stove. By just holding the wire in the flame (with TONGS of course), the end of the wire should ball up. Then you can pop it in a glass of water to cool down.
Well, unfortunately, I don't have a gas stove. I have an electric range. Would that work? No, I found that the damn wires wouldn't ball up on my electric range.
Oh yes. Desperate times drive us to desperate measures.
This afternoon I just HAD to have some headpins. No torch. No gas stove. (Oh, and I also tried to use matches. but that just didn't work. The only thing that got me was some blackened wire.)
But suddenly I realized, WE HAVE A GAS GRILL. Got my silver wire, matches, metal tongs, a glass of water, and perseverence. The gas grill worked great. Wow, those silver wires heat up and ball up quickly. Now I have head pins but NO HAIR on my fingers.
LOL.
Oh, it was GLORIOUS.